
Tuesday, February 13, 2018

Crafty Corner: Time for Tea


I have a friend with a toddler who LOVES to pretend in her play kitchen- she prepares tasty snacks for friends when they come to visit and serves a mean cup of coffee.

She also recently became interested in tea so her mama let her add a few real teabags into the mix (super fun)! But after a little while, the bags ran the risk of breaking open....an inevitable Tea-tastrophy!!!

My mind began to brew an idea (see what I did there?) to create some tea bags that would stand the test of time and allow her creative tea time play to flow freely!

The supplies: White organza fabric, silky white cord, mini pom poms, thick interfacing (also a sewing machine & a lighter...to burn stuff!)


Step 1- Cut the fabric into teabag sized shapes (2 organza rectangle shapes per teabag). Sew them together along 3 edges (leaving the top open) and then cut off the excess along with the top two corners to give it that teabag shape!
 
At first I thought I would turn the bags inside out after sewing so the thread would be hidden. But after trying that, it got a little puffy and didn’t sit flat....and I think I liked the rough edge better anyway! I did go around the edges with my trusty flame to seal off the fabric and prevent it from fraying when played with (just be careful not to get too close and set it on FIRE!):


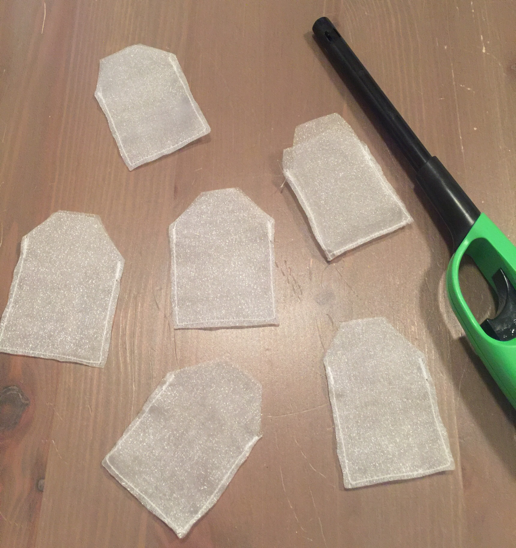


Step 2- Fill them with ‘Tea’...teeny tiny multicolored pom pom balls:


Step 3- The string and tea tag. I chose a thin, silky cord for the string and then went to the sewing machine to embroider letters onto some thick-ish interfacing I has saved from another project. I ‘wrote’ out the word TEA with my handy dandy machine for each of the 6 bags I had made and cut them all out in a tag-like shape. Then cut a matching blank shape to be the backing...sandwiching the cord in the middle and sewing all around the edge to secure:


Step 4- Putting the 2 parts together...I tied a little knot at the end of the cord and melted it just a little with the flame to keep the knot from eventually slipping, then placed it into the open bag and sewed the top shut:


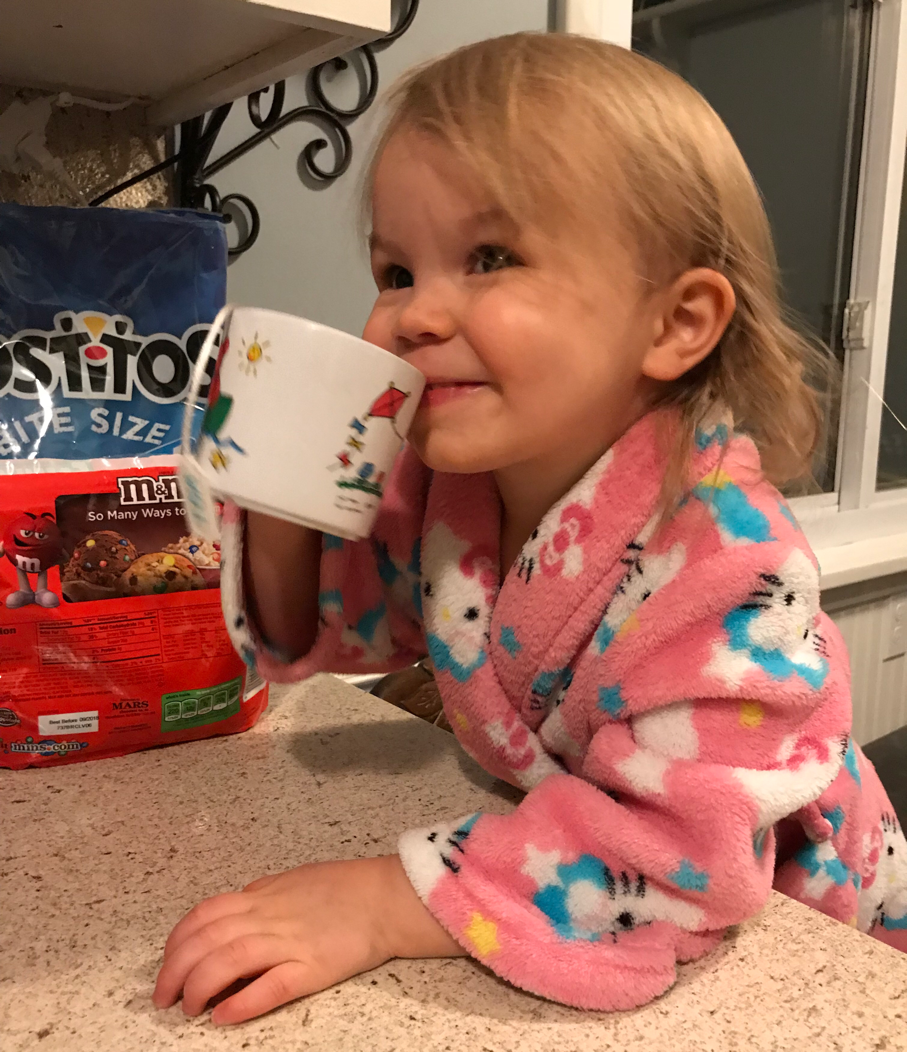
Tea is served!! I was pretty excited to present this gift to my toddler friend...wrapped them up in an old tea box for delivery:


Cutest little pretend tea ‘drinker’ on the planet!!


Tuesday, January 30, 2018

There’s a Super Bowl in town....that’s football.

Well, it appears that I am on a ‘write one blog post every 3 months’ plan lately....I’d like to improve on such things in the year of 2018. I’m gonna try.


Did you hear that the Super Bowl is in the neighborhood?? Aside from all the road closures, extra people and traffic, and the Vikings not making it to the big game, it’s a pretty cool thing- a great opportunity for Minnesota to show the world how delightful it is to live in the Bold North! SKOL!!!!! Maybe JT and I will magically run into each other on the street and become best friends while he is here...but probably not, since I most likely plan to hole up in my house, watch the game from my couch and consume mounds of tasty taco dip instead of venturing out in the world (where JT is) to watch with other humans.

In honor of the sportsing, I’d like to share a little felt football craft that I made a few months ago. I had purchased a Vikings game jersey for my Daddio for Christmas and had a vision to create a clever way to wrap it- hmmmm, a football jersey....perhaps concealed inside a......football?? Yes! Brilliant!

I did a quick google search of ‘felt football’ to get a few inspirational ideas of what a felt football might look like (I know what a real football looks like- I was looking for a pattern that would work for my specific football project needs...an essence of football if-you-will) :


Helpful ideas- now it was time to take these ‘football essences’ and translate them into something that would work for my project. I started by cutting out a 4 winged piece of brown felt, placed a cardboard rectangle in the center (for stability when wrapped up) and then placed the folded up jersey in the center (to make sure it fit):


Next step- I folded the upper and lower flaps in to cover the jersey, marked where the Velcro strips would go (and then removed the jersey and set aside so I wouldn’t ruin it with future rogue hot gluing action) and secured the Velcro tape in place (hot glued onto the felt, again sans expensive football jersey near hot glue gun):


Moving on...now to get into the nitty gritty of making this thing look like a football. I closed up the right and left flaps and cut some trapezoid shapes out of white felt to match up in the middle (these would be hot glued into place)...rounding off the corners of the brown to make it look finished:


After the hot glue cooled off (I only burned my finger once in the process...10 points for me!!), I used a single hole punch to make the holes for the laces- this was a little tricky to get thru both layers of felt, but it got the job done:


Then, I cut some curved strips of white felt to make the white football lines and hot glued those bad boys into place (I don’t know what they are really called...ya know, football lines...):


Headed to the 4th quarter of my football gift wrapping adventure!!! Now just the laces:


Touchdown!!!! Pretty happy with the end result- Go Vikes:)


Wednesday, October 25, 2017

Toddler Talk: High Five!

A few weeks ago, our theme in Toddlerville was 'What can your hands do?'- in previous weeks, we had a bit of an increase in using hands for pushing others to get what we needed instead of communicating. Mostly, this involved wanting a toy that someone else was using or wanting to play in an area where someone else was already playing....mine, mine, mine. Oh, toddlers.

This behavior is quite typical of Toddler types as they are in the midst of learning both language skills and the art of social interaction- but when we see an increase in the number of kids using hands as their primary use of communication, we need to find creative ways to address it.

One tool we prepared for the week's lesson we called 'High Five Hands'. A pretty simple idea to allow kids to think about what hands CAN do - Paper hands on sticks that the kids can hold and give High Fives to their pals instead of hitting them on the head or pushing them down. SIDENOTE: It's important to make many, many of these so all kids can have full access to one or two (as most children have 2 hands and want to hold one in each). Also, if there aren't enough for all, then we start fighting and pushing to have a turn, sheesh....and the helpful tool becomes part of the problem we are trying to eliminate. 

Ok here's the High Five Hands play-by-play:

I freestyled a toddler sized hand with paper and pencil to transfer to cardstock and use as a template (but tracing a real live toddlers hand would probably be much easier- I forgot to do such things before leaving work that day so had to improvise):


Then traced out many, many hands (also on cardstock):


Normally I would then staple a few sheets together for quicker cutting, but I didn't have a stapler. Improvisation #2...clips:


Many, many hands:


From there, my favorite. Laminating! I don't know why I love it so much. I just find cutting out laminated things to be relaxing and quite enjoyable:


After cutting out all the newly laminated hands (ahhhh, that was fun), I added a large popsicle stick to the back of each and secured it with some fun duct tape. I didn't really worry about how fancy it looked since I knew in my heart that these tools would get a lot of love (i.e....toddlers break things that are made of paper) from the kids:


I brought the High Five Hands to school and put them in a basket on the shelf for the lovely children to discover:


It didn't take long! They examined the new tools within minutes to figure out what to do with them- I gave a quick tutorial (by holding one and saying,"Hey, give me a High Five!") and the kids took it from there:


We will always have challenges related to toddlers needing things (right now) that they cannot communicate fast enough with words. Hitting and pushing with hands is indeed an effective method of getting what they need....it gets results! But, it's my goal as an educator to not only help the toddlers learn to use words to get what they need but also to begin to develop understanding about how to be a kind and caring human. We can be their model and guide to help kids find new strategies to achieve the same goal with practice, repetition and fun little paper hands:)

Tuesday, September 26, 2017

Toddler Talk: Art Review 2017

It's that time of year, folks! The 2nd annual Toddler Room Art Review. Last week, we showed the Toddlers two pieces of art work each day and asked them one simple question....What do you see?

The first day, just a few kids came over, took a look and shared their thoughts while others continued to play. But by the end of the week, almost the whole crew was gathered around to examine the works and were totally into it! I had to remind a few friends to sit down so others could see too....building a passion for art in toddlers is fun (and valuable!).

After 10 reviews, we typed up their observations and posted them in the hallway for the CCCC community to enjoy. Our toddlers had some pretty insightful thoughts about how each art piece 'spoke' to them....and such thoughts simply must be shared:


Are you ready????


Little artsy humans are so fantastic! Also...."She's huggin' a duck."